Normal mode:
1610 gear score
Hard mode:
1630 gear score
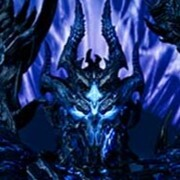
Thaemine Gate 3 Boss Guide
Overview
Full Video Guide


Universal Mechanics
Mortal Wound
Every time a player is hit by a dark attack, you get a stack of Mortal Wound which causes you to take 20% more damage for 2 minutes. Getting hit will also reset its duration.
Thaemine Identity Gauge
Whever this gauge is sufficiently filled up, the boss will cast a red attack.
The red attack instantly kills players hit by it.
Depending on the stage of the fight, attacks can either be enhanced or normal:
- Normal: x300 to x255
- Enhanced: x254 to Stage Break
- Normal: Stage Break to x90
- Enhanced: x90 to x0
Cubes
The boss will get its sword out, float it vertically and slash to the left.
For the enhanced version the boss will instead crouch and prepare to swing its sword forward.
Both can be distinguished by white effects around the boss, and both are back safe.
Pizza
The boss will levitate, holding its sword up in preparation to slash down.
Two pizza red indicator attacks will be cast. The enhanced version will alternate safe positions, but the normal version won't.
You can use the back attack indicator on the boss to find the safe zone in case of blindness.
Rings & Cross
The boss will pull its sword out, and float it horizontally.
A ring red indicator attack will appear, the safe zone will always be where the boss' red aura ends. This is followed by a cross red indicator attack, the enhanced version is always + positions safe.
Pacman
This is a Hard Mode only attack.
The boss will hold its sword in a tailguard position with a pacman-shaped red indicator attack, followed by an inside-safe ring attack. The enhanced version has an outside-safe ring attack instead.
You can identify this attack by its lightning effect.
Summon Clones
Summon Clones is a time based pattern.
The boss will start gathering energy towards the blue energy orb. When the orb explodes one (NM) or two (HM) will get a sword icon above their heads that summons a shadow clone.
Players with the sword icon should move to a x3+1 position (X position) to summon the shadow clone on the edge.
The boss will cast Teleport to Sword Wave (Normal Mechanic). This is followed by a slash behind the boss, avoid this at all costs.
Clones fire sword waves when the boss does a blue slash attack, shown by red indicators.
Virgil Slash
Virgil Slash is a time based pattern.
Combo: 1. Targets a player. 2. Front and back dash slash. 3. Barrage of slashes behind the boss. 4. Dash back and target another player. 5. Barrage of slashes in front of the boss. 6. Dash back and shoot continuous sword waves.
Major Mechanics
Raid Start
- A large red indicator appears, then Thaemine's sword drops in the center. This is followed by a fast approaching wave attack.
- The background will show a figure with one of its hands raised. The opposite side will have explosions.
- The sword will start a stagger check.
- Red indicator attacks will appear on top of the sword.
- After the cutscene, Thaemine will always cast Teleport to Sword Wave (Normal Mechanic).
x275 Albion
- Boss teleports to the center.
- Casts inside-safe spinning attack and walks.
- The boss levitates in the air and casts a wave of darkness from its position. Getting hit by this wave causes blindness.
- Boss shows red indicator attacks like Albion in the Oreha Preveza Abyssal Dungeon. After showing all three attacks, they will be executed in that order.
- In Hard Mode, the boss gives a dark seed to a player which explodes after the time runs out.
- Dodge the spinning attack by staying inside. Don't be to close to the boss.
- When the boss levitates, prepare to use space/dash to avoid its blindness debuff.
- Memorise the safe spots in the patterns shown.
- After seeing the three attacks' indicators move towards the safe spots for each attack.
- The player with the Dark Seed should move away from the other players.
- Using a will last two waves.
x255 Sword
- The boss will levitate and take reduced damage.
- There will be an inside safe explosion.
- One person will be targeted for the following attacks:
- Three pizza indicators will appear but not explode.
- One blue pizza explosion will appear and explode.
- One half map explosion will appear and explode.
- The first three pizza indicators will explode.
- The sword will fall on the targeted player.
- The targeted player should try and place the sword in the 9 o'clock position.
Thaemine's attacks follow this order:
- Summon Clones
- Laser/Sword
- Dark Wave (Wave of Darkness that needs to be spaced/dashed)
- Laser/Sword (Alternates from previous cast)
The Sword's attacks follow this order:
- Normal Pattern
- Normal Pattern
- Counter Chance, increases if normal is cast
Spin Counter
The sword faces a player, then spins for a counter.
Run away if counter is failed.
Dash
Sword will lay down, then be counterable.
If failed the sword will dash four times leaving a trail behind it.
Teleport Counter
The sword blinks away, then reappears for a counter.
Clones
Clones will spawn dropping pools.
Laser/Sword
The boss will target a player, then cast either a laser or a red sword. These alternate.
The sword needs to be kited away because it explodes.
Sword Tether
This tether rotates slowly, avoid touching it, you can pass through it using space/dash.
Uppercut
The sword will lay down, swing, then perform a barrage of slashes. This deals very high damage.
Teleport
The sword will disappear then smash down to the ground causing an outside safe then inside safe explosion.
Dark Wave
The sword will shake, then cast a wave of darkness to blind players.
x225 Safespot Find
- Boss teleports to the middle
- Boss casts Wave of Darkness
- In Hard Mode, the boss gives a dark seed to a player which explodes after the time runs out.
- Red indicators will fill most of the map, showing only a few safe spots.
- Safe spots get removed in waves
- Space/Dash through Wave of Darkness
- Seed player finds safe spot at the top, the rest find a safe spot at the bottom.
- Stay around the center and use the boss timer to wait around 5-8 seconds so you don't overcommit to a position without a safe spot.
x210 Horse Clash
- Following the cutscene the boss will ride in on a horse.
- The horse will jump then briefly radiate a white and gold aura, pressing "G" behind the boss initiates a clash.
- Each player can do one clash, which is just a minigame. This can be practiced in Trixion.
- After the first clash the boss will teleport to the middle and spawn multiple shadow horses that can knock players over.
- The boss will run away and then reappear, slowly approaching the center.
- It briefly radiates a white and gold aura, pressing "G" in front of the boss initiates a clash.
- If the shield is still there after around 10 seconds from finishing the second clash it will cause a wipe.
This is a DPS check, so focus on dealing damage in this phase. Keep in mind:
- Stay behind the horse whilst following it.
- After the boss jumps to the middle and radiates its aura, quickly run behind it and press "G" to initiate the clash.
- Complete the clash.
- Use Azena and Support Awakening to survive and DPS through the shadow horses.
- Another player should press "G" in front of the boss to initiate the clash after it slowly approaches the middle and radiates its aura.
3rd Clash
Players can now fall off and must be careful when getting hit by normal mechanics.
The boss will try to break the stage every 45/50 seconds:
- Boss teleports to one of the walls in ordinal (X) positions.
- Boss will initiate a clash and shows a large yellow indicator. Stand in the shown position to initiate the clash.
- Failing the clash will cause the indicated part of the map to be destroyed.
The boss will try to break the stage evey 45/50 seconds, players can now fall off. The boss will teleport to any edge in ordinal positions.
Stage Break
After around 2 red patterns and shadow clones the boss will try to break the stage in half again.
Ninaveh can be used when the clash telegraph appears to block the clash and let's you clash one more time.
When the boss uses summon clones, group up and stack the clones away from the battle.
Omega Slam
The boss charges his sword with large blue and black visuals, he will teleport and perform a large vertical slash.
Group up and space/dash after the teleport.
Windmill
The boss casts a circular red telegraph followed by an inside safe spinning attack.
x50 Shadow Fight
Thaemine teleports away then starts a typing mechanic, followed by the x225 mechanic. However, the typing mechanic and movement controls are inverted.
Thaemine slashes the map and teleports you to another dimension where you are fighting a clone of yourself. Supports can just use their awakening.
Final Phase
- Thaemine will cast an alternating explosion.
- Shadows will grow from the center.
- Last clash occurs at around x42.
- Group up at 9 o'clock
- After three shadows attack the group, the last clash can be initiated behind him.
- Ghosts spawn 50 seconds after the timer.
- Dodge the yellow telegraphs.
- Save Grabbed teammates.
- Use Wei as soon as the ghosts spawn.
Normal Mechanics
Teleport to Sword Wave
The boss teleports and smashes its sword down, then slashes causing a sword wave projectile. This deals very high damage.
This attack always happens after the Raid Start Phase and the timed pattern Summon Clones.
Double Slash to Back Grab
The boss will slash its sword twice, then teleport the sword behind him to grab a player. Followed by a left-side slam.
You can stay in front of the boss to avoid this attack after the slashes.
Sword Spin
The sword will spin in the air followed by a barrage of slashes. Afterward the boss will smash the sword down and cast an inside safe, outwards wave attack.
In other words, if the sword spins it's outside-safe then inside-safe.
Stomp
After stomping a wave is cast that inflicts blindness. Use a paralysis immune skill or space/dash through.
Draven
The boss will teleport away then throw swords away like a sawmill, this happens seven times. Then the boss will teleport to a player and smash its sword down.
After dodging the swords, stay behind the boss. Not dodging could cause a player to fall out of the battlefield.
Clock Rotation
The boss will spin its sword around itself:
- If the sword is moving clockwise then it's inside safe.
- If the sword is moving anti-clockwise then it's outside safe.
Sawmills
The boss will spin two swords, then throw them. This attack is front safe.
Supports can use their damage reduction skills to allow back-attack clases to continue DPSing.
Charge Slam
The boss will levitate, charge its sword and smash it down.
This attack is targeted, so the targeted player shouldn't move around so the party gets free DPS.
Enhanced Mechanics
Fear Orbs
Thaemine will hold up a white orb and fire it. On hit it will explode and fire more projectile orbs that cause fear.
Afterwards he will perform a barrage of slashes. People with can tank these orbs.
Shadow Pillars
Themine will stab his sword on the ground. The four nearest players will have blue telegraphs appear beneath them, spawning pillars.
Players with the telegraphs should place the pillars away from the party because getting hit by a pillar will blind you.
180 Slash
Thaemine's sword will glow, and the back and head attack indicators will disappear. He will then perform a 180 degree slash in front of him.
Alternate Explosions
Thaemine lifts up his sword and stabs the ground, creating a large red telegraph. Following this telegraph a similar one will appear with alternated safe spots.
Stab Combo
Thaemine will wave his sword above his head and prepare to stab targets in front of him.
X Slash
Thaemine will dash backwards then jump forwards to create an X-shaped explosion.
Velganus
Thaemine will hold his sword vertically, with a + shaped effect. This is followed by a Velganus-like attack.
Supports should place their damage reductions down and benefit from the free DPS.